Saturday, November 28, 2009

Do-It-Yourself (DIY) Shrimp Cocktail


I really had to think about whether or not our afternoon snack was blog worthy or not.

I quickly came to a resounding 'YESSSS'. Here's why:
1. The shrimp you get at the store are most likely overcooked....to death
2. When you do it at home you can season it to your mood of the day
3. Too many people have seen Joe or I making cocktail sauce and were in amazement at how easy it was.
4. When you get the cooked shrimp at the store, those shrimp were cooked then frozen then thawed for who knows how many days. (yuck!)
5. I got tips....read on

Therefore, the need to blog about the right way to do Shrimp Cocktail does exist!

Do-It-Yourself (DIY) Shrimp Cocktail

Shrimp
2 pounds uncooked shell off shrimp (I buy excellent quality frozen shrimp so I can have shrimp on hand all the time. The size can vary depending on you're preference - remember the smaller the count per pound the bigger the shrimp)
8 cups of water
1/2 cup white vinegar (this is the secret to tender shrimp)
1 tbsp kosher salt
1 tbsp red pepper oil
1 tbsp Old Bay seasoning

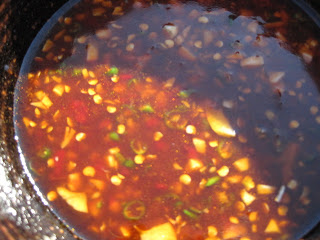
If using frozen shrimp, thaw. Rinse and strain the shrimp. Bring the water, vinegar, and salt mixture to a boil. Add shrimp. Now Listen - COOK ONLY FOR 2 1/2 MINUTES. Strain. NO MORE. DO YOU HEAR????? This will you ensure your shrimp are De-li-cious! Put in a bowl or tupperware and add the oil and seasoning. Toss and chill for a few hours.

Cocktail Sauce
2/3 cup of ketchup
2 tbsp horseradish sauce
1 tsp freshly ground black pepper
juice from 1/2 lemon

Mix all the sauce ingredients and chill until ready to serve.

San Marzano Tomato Flatbread with Garlic Chips


Yesterday I was called upon to cook for an impromptu party. My meal of choice: clam chowder (I'll share later), San Marzano Tomato Flatbread, and Ghirardelli double chocolate brownies.

This flatbread was Devoured by our friends. I do a capital 'D' because it was eaten that fast! I meant for it to be dipped into the soup but instead everyone just stood over it and chowed. I'll take that as a compliment any day of the week!
San Marzano Tomato Flatbread with Garlic Chips
Flatbread
1 tsp active yeast
1 cup warm water
1 tsp sugar
2 1/2 cups bread flour
1 tsp kosher salt
2 tbsp oil oil
Sauce
1 28 ounce can of San Marzano whole tomatoes (San Marzano tomatoes are considered the best tomatoes in the world. I buy by the case.)
Splash of white wine
1 tsp sugar
1 tsp salt
Topping
3 cloves of garlic
1/4 cup fresh oregano
1 tbsp dry oregano
1/4 cup olive oil

In a warm bowl mix the yeast, sugar and water together and let sit for a few minutes. Add the olive oil. Add a cup of flour and then the salt. Mixing with a fork add the rest of the flour. With the heel of your hand, knead the dough about 20 times to build up the gluten. Let rise until doubled in size (about 1 1/2 hours).

Take the skin off the garlic and thinly slice. On low to medium heat, heat the olive oil in a small saucepan. Once the oil is heated cook the garlic to slowly crisp. Stir occasionally. Once crisp remove the garlic from the oil. Save the oil.

In a saucepan, place the tomatoes. Before heating, squish the tomatoes repeatedly between your fingers to break them down. Add the sugar, salt, and wine. Simmer on low until the tomatoes the liquid is gone. This will take approximately a 1/2 hour.

Sprinkle your counter with all purpose flour. Place the dough on the counter and cut in four equal pieces. Roll the dough out in long strips about 5 inches wide. Roll it as thin as you can.

Place parchment paper on 2 baking sheets. Drizzle with olive oil and spread it evenly with a paper towel. Place the flatbread strips on the baking sheets. Brush on the garlic oil that you saved. Spread the flatbread with the tomato paste. Sprinkle the fresh oregano, dry oregano and garlic chips evenly over the flatbread. Bake in a 425 degree oven for about 10-15 minutes until crisp.

Friday, November 27, 2009

Steamed Halibut with Teriyaki Glaze


Flaky white fish is one of my absolute favorites. Halibut is flaky, firm and tender with very low fat content. The cut of fish that I am using is a thick (1 1/2 inch), 1 pound piece. To fully take advantage of the flaky tender qualities of the fish, I wanted to ensure I cooked it thoroughly in the middle without overcooking the outside.

Steaming the fish worked perfectly. It allowed me to cook the fish through with minimal spices. Instead of spicing the fish while cooking I imparted flavor when I plated the fish by glazing it with teriyaki sauce. This resulted in a clean, fresh tasting fish. Divine!

Steamed Halibut with Teriyaki Glaze

Teriyki Sauce
1/4 cup mirin (mirin is a sweet Japanese rice wine)
1/4 cup soy sauce
1/4 cup dry white wine
1/4 cup sugar
1 inch cube of ginger
2 cloves garlic
1 tbsp cornstarch
2 tbsp water

Deskin the ginger and mince. The easiest way I find to do this is to cut thin slices of the ginger. Line the slices up and run your knife through them to create very thin julienne strips. Then going in the opposite direction cut in very thin minced pieces. Remove skin from garlic cloves and mince. In a small saucepan add the mirin, soy sauce, ginger, garlic, sugar and wine. Bring to a low simmer. In a separate bowl mix the cornstarch and ginger. Slowly drizzle the cornstarch mixture into the sauce, mixing thoroughly. Raise the temperature to a low bowl. As soon as the sauce bowls reduce back to low heat. The cornstarch mixture will create a wonderfully thick teriyaki sauce.

Steamed Fish
1 pound piece of Halibut cut in half
1 cup dry white wine
1 tbsp olive oil
2 green onions - thinly sliced
salt and pepper

Heat a lidded skillet to medium high. Drizzle the pan with olive oil. Sprinkle the flesh side of the fish with S & P. Once the pan is hot place your fish in, flesh side down. After about a minute turn the fish and add the white wine. Place the lid on the pan to steam the fish. Cook for about 10 minutes. Turn after about 5 minutes. (The cooking time may vary if you are cooking a thinner piece of fish.)

Serve with steamed rice and your favorite vegetable. Place the fish partly on the rice and spoon a layer of your teriyaki sauce over the fish. Garnish with the green onion.

Thursday, November 26, 2009

Turkey Salad with Cranberries and Dill


Who says you need to be stuck using all those turkey leftovers in a boring cold turkey sandwich?

Spice it up by adding maximum flavor and texture. The tart, sweet, chewiness of the dried cranberries along with the crunch of the celery will leave your tastebuds singing! Serve yourself a glass of apple cider, sit down, and enjoy!

Turkey Salad with Cranberries and Dill

2 cups of leftover turkey chopped into 1/2 inch cubes
2 stalks of celery - small diced
1/3 cup dried cranberries
1/3 cup red onion -- diced
1/3 cup mayonnaise
1 tsp dried dill weed
coarsely grated black pepper and salt to taste
a spash of dry white wine

To get a perfect celery dice take the stalk and cut it twice lengthwise down the stalk to create 3 thin sticks of celery. Hold together and finely dice. Add all the ingredients together and mix. Serve open face or as a sandwich on your favorite toast.

Tuesday, November 24, 2009

Panko Crusted Jumbo Shrimp with Garlic Chili Remoulade


Football is IT in my house. I love to eat with my fingers and when it comes to football season you have all the opportunities in the world to go on a cookin' spree. Football games are an excuse to make the tried and true finger food or that recipe you've stuffed in a book to experiment with later. Thanksgiving weekend is a great weekend to try out football food on your guests. They are probably all a little tired of turkey and are craving a new taste. With three games on Thursday, Ohio University football on ESPN Friday, Saturday college gameday, and NFL Sunday and Monday this weekend was made for tailgating.

Fried Shrimp are a tried and true although this time we went all out. These shrimp are with a larger shrimp, 16-20 ct, compared to what I normally use. The texture of the shrimp is fantastic. You have a crisp panko shell with a luscious tender shrimp. Dipped in your favorite sauce I can guarantee you'll keep coming back to this recipe!

Panko Crusted Jumbo Shrimp with Garlic Chili Remoulade
Shrimp
10 ounces of panko
1 1/2 pounds of 16-20 ct. shrimp
1 1/2 cups all purpose flour
2 eggs
1 cup 2% milk
1 1/2 tbsp Old Bay seasoning
1 tsp kosher salt
2 cups canola oil

Remoulade Sauce
2/3 cup mayo (I prefer lite Hellman's)
1 garlic clove
1/2 lemon
1 tbsp garlic chili sauce from your Asian aisle
salt and pepper to taste

Prepare the remoulade sauce and place covered in the refrigerator. This will allow the garlic time to flavor the mayonnaise.

Next, you will coat the shrimp in this order, flour, egg mixture, and panko. Prepare the coating vessels. Add the flour to a baggie. Add panko, Old Bay seasoning and salt to another baggie. Mix these dry ingredients. In a flat shallow bowl, mix the milk and the eggs.

Create an assembly line. Toss a few shrimp in the flour. I did about 8 per batch. Don't do too many at one time or your shrimp will become a clumpy mess. Tap off as much flour as possible and add those shrimp to the egg mixture. Turn the shrimp in the egg mixture and then add to the panko mixture. Then remove and lay on a sheet pan or plate. Continue until all shrimp are coated.
A few tips here:
1. try to use one hand for wet ingredients and one for dry. This way you'll avoid getting everything coated and you'll hopefully have less mess.
2. Try to lay the shrimp in a single layer so they don't stick together.


In a small, heavy pan (I prefer my little Le Creuset) heat the oil. Test the oil with a small piece of crumb. Once it sizzles the oil is hot enough. Slowly drop in the shrimp. I would do small batches of 6-8 shrimp to avoid lowering the temperature of the oil too much. Cook each batch until golden brown. No more than 3minutes. Use a Chinese spider to remove the shrimp from the oil. The common mistake when cooking shrimp is to over cook so they are tough and chewy. Cooking for 2-3 minutes will guarantee a tender, succulent shrimp.

Monday, November 23, 2009

Spinach Balls


Spinach balls are the ultimate easy appetizer! I absolutely love them because they are so quick to prepare, always taste great, and a crowd pleaser. How many boxes of spinach to use is the biggest dilemma when making this satisfying snack.

This recipe makes about 5 balls depending how how big you make the balls. I'd recommend making a triple or quadruple batch!

Spinach Balls
1 box frozen spinach - thaw
1/2 c. stuffing mix (I use Pepperidge Farms Herb Seasoned Stuffing.)
1/3 cup chopped red onions.
2 tbsp melted butter
1 egg
1 tsp salt
freshly ground pepper

Heat oven to 400 degrees.

Thaw the spinach. Squeeze in your hands to extract the water. Fluff up the spinach one you've removed as much water as you can. Add the remaining ingredients. Line a baking sheet with tin foil and rub oil on the foil to avoid sticking. Make 1 1/2 to 2 inch balls. Cook for about 18-20 minutes turning half way through cooking process.

Asian Happy Eggs:)


no words needed....well maybe a few. Check out one of my favs...Kylie Kwong's book 'Heart and Soul' page 11. Some where I read a comment that complained Kylie doesn't know how to cook. The person that made that remark obviously hasn't made this recipe.

This dish is without a doubt a 'peel my face off the bed, slap my ass, smile, and start a fantastic day' breakfast.

Asian Happy Eggs:)

1 cup canola oil
4 eggs
2 green onions
2 tbsp oyster sauce
1 tbsp soy sauce

In your best seasoned wok, heat the oil until it reaches it's smoke point (turn your vent on).

Crack the eggs in a bowl. Add the soy sauce.

Carefully, add the eggs to the oil. After 1 minute add the onion and 1 tbsp of oyster sauce. Cook for another minute. At this point I carefully remove the eggs from the oil with a giant spider utensil and then discard the oil. Return the eggs to the pan to continue to crisp. Plate while the yolks are still runny. Drizzle with oyster sauce.

This is now my favorite way to wake up during the weekend...

Sunday, November 22, 2009

Grilled Jerk Turkey


My family in SE Ohio hasn't had a traditional T-day dinner in years. I'm not a turkey hater like the rest of them. I've been feeling the need to figure out a way to make a some what traditional (although I'm never really 'traditional' because I always like to buck the system) thanksgiving day dinner at least the husband would eat.

Last weekend I got a small turkey. Monday, I removed the back bone and cut the turkey in half. The half that I was cooking for this weekend I set aside for the brine. I sectioned the other half by white and dark meat and then put in the freezer for another time. In a large bowl, place the turkey in the brine liquid. One day before cooking I removed the brine and then added my marinade.

I was feeling a lot of pressure. The Hub has been ridiculing me all week because he is not a turkey fan. How would a good wife cook a dish that is not the Hub's fav on a Saturday night? I'm starting to sweat just thinking about it....

It was phenomenal! Wow!

Grilled Jerk Turkey
1 small turkey
1 1/2 cup limeade
1 cup chicken stock
Brine
Water to cover 1/2 turkey
1 cup kosher salt
1 cup sugar
1/2 cup hot sauce (I used sambal oelek)


Marinade
1/2 cup olive oil
1/2 cup of your favorite jerk spice
1/4 cup soy sauce

Place the turkey in the brine at least 72 hours before you plan on cooking the turkey. Remove from the brine 24 hours prior to cooking, rinse, and place in the marinade.

Separate the breast and dark meat so it will be easier to navigate on the grill

Heat your grill on low. Place a double layer of heavy duty tin foil on the grill. With pinchers roll all 4 sides up about an inch so juices will not drop on the grill. Put the turkey on the foil. Cook for about 10 minutes and turn. Once you turn, add limeade and press foil on top off the turkey. Placing the foil on the turkey while it's cooking will allow it to steam a little so it doesn't dry out. Cook on the grill for an hour. After an hour remove from grill, place in a baking pan, drizzle about a cup of broth over the turkey and place in a 375 degree oven for about an hour.

Delicious! Lick, lick.......

Saturday, November 21, 2009

Butternut Squash and Potato Au Gratin


Butternut Squash is an amazing food. I know I've told you this before but I can't seem to get over how good they taste. The butternut squash recipes I've shared with you so far are B-nut squash fries and B-nut bread.

I love those recipes but this time I have truly captured the magic of the B-nut squash.

Butternut Squash and Potato Au Gratin

1 small butternut squash
5 Yukon gold potatoes
1 medium red onion
3 large cloves of garlic

Sauce
16 ounces chicken stock
1/2 cup sour cream
1/2 cup whipping cream
1 tbsp french thyme
1 1/2 tbsp kosher salt
1 tbsp freshly ground black pepper
1 cup provolone cheese

Heat oven to 375 degrees. Peel and deseed the squash. Wash the potatoes. Remove skin from the onion and garlic cloves. Thinly slice the squash, potatoes, onion and garlic.

Whisk the sauce ingredients together.

Oil a deep 10 inch baking dish. Start layering the Au gratin ingredients: potatoes, garlic slices, onion, sauce, squash, cheese. Repeat for 2-3 layers. Cook at 375 degrees for about 40 minutes. Remove from oven, cover with tin foil and let sit for at least 10 minutes.

Pho


I love Asian soups. But, I've never had Vietnamese Pho soup until this week. My friend and I visited the Short North and North Market in Columbus. In doing my webernet research prior to the visit I found out their was a Vietnamese food stall in the market. I've been researching recipes of Pho for a few weeks so I of course took the opportunity to get my first taste.

Very interesting. Pho is completely different than any other soup, or dish for that matter, that I've ever tasted. The beef broth was served with rice noodles and thin slivers of beef. On the side I was given a stem of Thai basil, a healthy portion of bean sprouts, a lime wedge and hoisen sauce. I also took advantage of the Sriracha hot sauce on the counter. The recommended way to enjoy Pho is to tear the basil leaves into the soup and top it with the sprouts. Thai basil is so different that Italian basil. It tastes like a combination of basil and mint. The crunchiness and flavor of the sprouts in the soup was very pleasent.

Now I've got to figure out where I can get about 5 pounds of beef bones without paying an arm and a leg so I can make my own version of Pho. If I'm going to have a true Pho experience in my house I have to at least make my own beef broth.

Wednesday, November 18, 2009

Chinese Egg Drop Soup


Soup, especially Asian soups can be so theraputic. Regardless of why I need a lift, when I have the egg drop soup at our local chinese restaurant it is without fail transformative. I will without a doubt feel more positive and happy. Of course I had to try to make egg drop soup so I wouldn't have to depend on myself going to a restaurant to enjoy it.

The first time I made egg drop I pretty much tasted it in my mind and added ingredients that I thought would go into it. I pretty much nailed the flavor I was looking for and have been doing minor tweaks to the recipe ever since. The most recent tweak is making homemade stock using chicken feet. Chicken feet are commonly used in Asian cuisine in stock but also as an appetizer or dim sum. The gelatinous properties of chicken feet are considered by many to strengthen nail and hair along with promoting general joint health.

Egg Drop Soup
Stock
1 1/2 pound chicken feet
1 inch cube ginger
3 green onion - cut in half
1 tbsp sesame oil
6 cups water

Finishing the soup
4 green onion
1 inch cube peel ginger
1 1/2 tbsp cold water
1 1/2 tbsp cornstarch
2 eggs
1 tbsp soy sauce
1 tbsp sesame oil
1 tbsp chili garlic paste
1 tsp salt
1/2 tsp ground white pepper
The first step to making a good stock is to boil the feet/bones for just a few minutes to release impurities. Fill a pot with water to cover the feet. Bring to a boil and allow to boil for a minute or two. Pour water and chicken feet into a strainer. Rinse the chicken feet. Clean the pan.

Return the chicken feet to the clean pan and add 6 cups water. Add the ginger, onion and sesame oil. Simmer for about 2 hours in a partially lidded pot. After you've simmered the chicken feet for a few hours, strain the liquid through a fine mesh strainer into another pan to separate the feet and other ingredients. After evaporation you will probably be left with about 4 cups of stock.

Finely slice 4 green onion on the diagnol. Finely dice 1 inch cube of peeled ginger. In a small bowl mix the cold water and cornstarch. In a separate small bowl beat the eggs with a fork.

Heat the strained stock in a pot to a simmer. Slowly add the cornstarch mixture, mixing continuously and bring the stock to a boil. Once the stock bowls reduce heat to a simmer. Add the green onions and ginger. Simmer for about 10-15 minutes. When you are ready to serve, drizzle the eggs slowly into the soup while stirring. This will create the egg ribbons that are so characteristic of egg drop soup. Add the soy sauce and sesame. Serve.

Comfort food at its best!

Tuesday, November 17, 2009

Spicy Asian Noodles with Grilled Shrimp


Spicy Asian Noodles with Grilled Shrimp

Dressing
1 lg garlic clove
1 tbsp. peanut butter
3 tbsp. soy sauce
2 tbsp. rice wine vinegar
2 tbsp. sesame oil
2 tbsp hoisen sauce
1 tbsp honey
1 tbsp fish sauce

1/2 pound dried spaghetti noodle
4 green onion - cut thinly on the diagonal
7 Thai bird chilies
3/4 c. sugar peas
3 carrots - thinly sliced
1/2 c. cilantro - chopped
1 pound peeled and deveined shrimp with the tails removed
Wood skewers soaked in water for 1 hour

Cook pasta according to package instructions.

Mix all ingredients for the dressing. Reserve 1/4 cup of the dressing. Skewer the shrimp and baste with the reserved 1/4 cup of dressing. Grill the shrimp on low for about 2 minutes on each side.

Mix the pasta, dressing and cut vegetables.

Serve chilled or warm. Enjoy!

Monday, November 16, 2009

Sauteed Bass Served with Lemon Wedges

I think I might be creating a monster. When it comes to my food blog, my husband teases me (at least I think it's teasing...) that he always gets dinner late because I'm too busy taking pictures to show you. Now, I will admit, I have burned a few things and there have been a few nights that took me a little longer than usual but overall, I think he's exaggerating.

He must be getting somewhat of a kick out of this new experience we call 'creating a blog'. This weekend our weather was Gorgeous! Yes, and that is with a capital 'G'. While taking the dogs for a walk down by the pond he could see fish swimming around. That is pretty strange for this time of the year but he decided to go see if the fish were actually biting. I meandered down by the pond to watch and keep him company. Glad I did because it started off as if he was being filmed for a comedy shoot.

He catches a HUGE fish. It was beautiful. He puts it on a stringer and puts it in the pond. Too close to shore. He moves it out further. Stringer slips out of his finger. Dinner swims away. Sad. I was tasting that fish sauteed in some luscious butter. No More.....I watched for a little while longer but he wasn't having any more nibbles so, bitter that I was, I headed back up to the house.

About a half hour later, The Hub comes sauntering up to the house with a grin that told me how proud he was of himself. In his hands were the two most beautiful fish.

Now this is the part that proves he likes my blog almost as much as I do. He fried those fish up and plated them beautifully! And then, suggested, quite adamantly, that I take a picture to show you.


Sauteed Bass Served with Lemon Wedges
2 Large Bass (or other type of fish)
1 tbsp butter
1 lemon
Salt and pepper to taste

Skin the fish leaving it whole. You could fillet them at this point but you'll lose good meat in the process so we prefer to leave it whole.

In a heavy skillet with a lid heat over medium flame and melt the butter. Sprinkle salt and pepper on both sides of the skinned fish. Place the fish in the skillet and cook for about 10 minutes, turning halfway in between. Cook with the lid on.
Serve with lemon wedges and enjoy the delicate texture of fresh caught bass.

Sunday, November 15, 2009

Butternut Squash Fries


My friend Anna turned me on to this side dish. It's really surprisingly how easy it is to make. The most time consuming part is cutting up the squash into fries. Butternut squash fried are somewhat similar to sweet potato fries except the squash has considerable less starch. I think this results in the squash fries as having a much more intense and fresh flavor. I've experimented with different thickness of cuts for the fries and my preference is a thinner fry - about 1/4 inch.

Butternut Squash Fries

1 large Butternut Squash
2 tbsp olive oil
1 tbsp coarse salt
freshly ground black pepper to flavor

Heat oven to 425 degrees.

With a sharp vegetable peeler, peel the entire squash. Cut in half and remove the seeds with a spoon. With the flat side of the squash on the cutting board, cut 1/4 inch slabs. Once you have the squash cut into 1/4 inch slabs then cut the slabs into 1/4 inch fry slices.

Place all the fries on a tin foil lined sheet pan. Drizzle the fries with the oil and sprinkle the salt and pepper. With your hands, toss the fries to ensure they are coated in the oil salt and pepper.

Cook in a 425 degree oven for 20-25 minutes until desired doneness. Turn half way through cooking. (Careful not to over cook as this will result in a limp fry.) Serve with your favorite condiment. My favorite is ketchup!

Saturday, November 14, 2009

Chinese Curried Drumsticks

Feel neglected because I didn't post yesterday? Sorry, I've been having to much fun eating and I forgot to take pictures to send you but I promise to revisit what I was enjoying and I'll show you in a future post.


Have you ever had a chinese curry? It's gooood. Completely different than a madras curry. It's more mild and super yummy.
Chinese Curried Drumsticks
5-6 Chicken Drumsticks
2 tbsp olive oil
2 cups chicken stock
1/2 can coconut milk
2 tbsp 'Oriental Curry Powder'

1 tsp kosher salt
2 tsp freshly ground pepper
2 tsp crushed red chili flakes
1/2 tsp cayenne powder
1 medium onion
2 baby bok choy
2 carrots - peel
8 cremini mushrooms

Heat oven to 400 degrees.

Heat a heavy sauce pan, heat the oil and saute the drumsticks. Sprinkle with 1 tsp salt and 1 tsp pepper. Brown drumsticks turning periodically for about 10 minutes.

Roughly cube the onion. Take the stem off the bok choy and quarter. Peel and cut carrots on the bias. Cut mushrooms in quarters.

In a small bowl mix curry power and 1 cup of chicken stock. Once mixed add to sauce pan. Add remaining ingredients. Bake for 20 minutes.

Wednesday, November 11, 2009

Quesdillas with Pork and Fire Roasted Chilies


One of my husband and I's favorite weekend meals is a pork roast. We really like pork roast cooked in a variety of ways whether it's smoked, slow grilled, or slow roasted in the oven. Besides the fact that the roast is absolutely divinely delicious the day we make it, I especially love it because I always try to squirrel away a chunk for later.

If we have a lot left over I'll wrap a big piece well and throw it in the freezer. Quesadillas are one of my favorite weeknight dinners and the pork is a perfect meat for the filling.

One of the ways my husband and I love to extend the summer season is roast peppers, peel the skin off, put the peppers into freezer bags, and then throw them in the freezer. I learned this trick from my brother in law, Matt. Last time we visited, he made us a wonderful chili and he used a bag full of roasted chilies that he had prepared in advanced and pulled out of the freezer when he was ready to use them.

My sister also taught me a trick. Her jalapeno plants went wild this year and she had more than she could use. She rinsed and dried the jalapenos, put them whole in a freezer bag and put them right in the freezer. Before our first frost of the fall, we stripped the peppers off our plants and used this technique to save them for later.


The saved pork, fire roasted chilies, and jalapenos were perfect in these quesdillas.

Quesdillas with Pork and Fire Roasted Chilies
(This recipe makes 2 quesadillas.)
1 pounds of pork roast (preferably roast from pork shoulder)
1/2 tbsp olive oil
3/4 cup of fire roasted chilies - chopped
2 jalapenos - minced
3/4 cup monterey jack cheese
2 tortilla shells

Thaw the pork and with a fork pull the pork into little shreds. In a skillet on medium high heat, add olive oil. Swirl the pan to cover. Add pork roast, chilies and jalapenos. Heat through for about 5 minutes.
In a separate pan, brush oil on the pan to keep the quesadillas from sticking. Place the tortilla wrappers in the pan so half the wrapper is flat on the skillet with the other half draping up the side of the pan. Sprinkle a light layer of cheese on both wrappers. With a spoon, place a layer of the pork mixture on top of the cheese. Add another layer of cheese on top. Fold over the part of the wrapper that was draped over the side of the pan. Cook on medium high. Flip the first side after the wrapper is golden. The first side will probably take about 4 minutes with the second side taking about 2 minutes.

Tuesday, November 10, 2009

Mushroom Stomboli


This recipe is perfect for entertaining. It's relatively easy and simple. A lot of people I talk with find 'dough making' as intimidating. It really is quite simple and effortless. The most important part is that you need to let the dough rise for a little over an hour so it does require a little preparedness.

The complex flavor that you get from a variety of mushrooms is the secret to this dish. Portabellas offer a 'meaty' flavor while the creminis or 'baby bellas' are a bit richer in flavor than the more traditional button mushroom. Oyster mushrooms are incredibly rich in flavor. Hard to describe, the oyster mushroom has a complexity and depth in flavor that is surprising. Don't let the appearance of the oyster mushroom scare you. They're great in flavor and one of the easiest mushrooms to prepare.

Mushroom Stomboli

Dough
1 tsp active yeast
1 tsp sugar
3/4 c. water
1 1/2 to 2 cups of bread flour

Filling
2/3 pound oyster mushrooms
1/2 pound cremini mushrooms
2 portabella caps
1 tbsp olive oil
1 tbsp butter
1 tsp salt
1 tsp freshly ground black pepper
4 ounces fontina cheese
4 ounces of gruyere cheese

1 egg - whisked


Mix yeast, sugar and water in a large bowl. Let yeast bloom for a few minutes. Add olive oil. Mix in 1/2 cup of flour. Add salt. Continue mixing in bread flour 1/2 cup at a time. Add just enough flour until the dough is kneadable. The amount of flour the dough will take will vary depending on humidity. Knead dough for about 2 minutes. I like to knead the dough directly in the bowl to minimize the mess factor. Let rise in a warm place until double, about 1 1/2 hours.

Preheat oven to 400 degrees.


Chop the mushrooms. Portabellas - clean by wiping, discard stem, and dice. Creminis - clean and slice. Oyster - remove tough stem and chop (mine come very clean). Add oil and butter to a skillet heated on high. Add mushrooms and cook on high turning the mushrooms every few minutes. Cooking the mushrooms on high will help get release the water from the mushrooms creating a slight crispiness. Cook for about 8 minutes. When mushrooms are done, remove from heat and set aside.

Grate cheese. Prepare a sheeet pan by placing tin foil on the pan and lightly brush with olive oil. (I like to line the pan with foil to minimize clean up.)

Roll dough out in an oval shape. Place the rolled dough on the prepared sheet plan. Sprinkle 1/2 cheese down the middle the center in a 4-5 inch wide layer. Place mushrooms down the center on top of the cheese. Sprinkle remaining cheese on top of the mushrooms. Fold one side of the dough over the mushroom and cheese layer. Fold the other side so that the dough overlaps. Using a sharp knife cut 3 vents on each side to allow steam to escape.

Cook at 400 degrees for about 18 minutes. When the stromboli has a light golden color, about 5 minutes from being done, brush it with the whisked egg to create a shiny golden appearance. Sprinkle with a coarse flaky salt. Put back in the oven and cook until golden. Remove from oven and let rest for a few minutes. Slice and enjoy.

Monday, November 9, 2009

Smoky Chipolte Linguine with Ancho Chili rubbed Scallops


My grocery store is okay but they tend to be limited in a few areas. Actually, our grocer does a pretty good job seeing we are located in Southeastern Ohio. There just isn't a lot of variety in some departments, especially the seafood department. When I go to larger metro areas I love to explore grocery stores. Probably is a sign of a true foodie, but, it's fun so what can I say?

While in the Columbus area last week for work I had the opportunity to check out a new market, Weiland's Gourmet Market. A little out of the way for me at the time but I'm glad I went. Their seafood department was top notch. I was extremely impressed with the variety and apparent quality. I picked up the scallops used in this dish and let me tell you they were easily one of the best batches of scallops I've cooked yet. Okay, I know I'm a really good cook ( ;)wink ) but I do need to give credit to the high quality of the scallops. Weiland's wine, meat and cheese departments were equally impressive.

Smoky Chipotle Linguine with Ancho Chili rubbed Scallops

Pasta
1/2 pound dry linguine pasta
1 c. reserved pasta water
1/2 c. heavy whipping cream
1 large chipotle pepper in adobe sauce
1/2 c. Parmesan cheese
1 tbsp olive oil
1 tbsp flat leafed Italian parsley

Dry Rub
1 tbsp ancho chili powder
1 tbsp brown sugar
1/2 tsp ground cumin
1 tsp Kosher salt
1/2 tsp freshly ground black pepper

8 scallops
Lemon wedges

Cook pasta according to directions on package, shortening cook time by 2 minutes. Reserve 1 cup of pasta water.

Mince chipotle pepper.

In a saucepan, simmer add oil and chipotle. Cook for about 30 seconds. Add reserved pasta water, cream, and cheese. Simmer for about 5 minutes. Finish at the end with the parsley.

Combine dry rub ingredients. Press both sides of each scallop in the dry rub. Place scallops on a medium high grill. Cook on each side for about 3 minutes.

Mix pasta with the sauce. Plate by placing pasta on dish with scallops on time. Serve with a lemon wedge.

Saturday, November 7, 2009

Thai Grilled Chicken Wings


Looking for that perfect tailgating party food? Well, you've found it here.

The only way I make wings is on the grill. Chicken wings have the skin on and are therefore more fatty than other chicken pieces. Grilling allows for the fat to drop off and away from the meat.

Hmmmm, yummmm....I don't know about you but I so love it when you have the combination of crispy, char from the grill, moist meat, and a great sauce. Today I was looking for an Asian flair.

My visit to the Asian grocer in town inspired me. I picked up some tamarind paste and that's when my Thai sauce recipe came together.

Thai Grilled Chicken Wings
2 pounds of whole chicken wings
Basting Sauce:
4 thai bird chilies
1 lg clove garlic
2 tbsp of lime juice - my lime was juicy and only required 1/2 lime
2 tbsp sambal oelek
2 tbsp honey
1 tbsp olive oil
1 tbsp fish sauce - Viet Huong brand
1 inch cube of tamarind paste


Finely mince the chilies and garlic.

Squeeze tamarind paste through your fingers to make sure there are no seeds.

Incorporate all basting ingredients together and mix well.

Rinse the chicken wings.

Heat grill to high. Place wings on and immediately turn to medium to low.
(Every grill is different so guage the grill temperature on how your own grill heats. My grill is natural gas and tends to be really hot so I cook a lot on low. My low maybe medium to high on you're grill if you're cooking with propane.)

Baste the top side of the wings with sauce. Cook for about 10 minutes and turn. Baste the other side. Continue cooking and basting, turning every 7 minutes or so for about 30-40 minutes (depending on your grill).

Again, every grill is different. Once you get used to grilling wings you will know by the feel of the wings when they are done. When done, the wings become lighter in weight. I always recommend testing doneness by pulling one wing off the grill and pulling it apart to make sure it is done.

Cilantro Chicken with Steamed Rice


I stumbled upon this wonderful dish unexpectedly. For lunch my friend and I went to our local chinese restaurant where they had a few new dishes on the menu. One of which was 'Cilantro Chicken'. I love cilantro so I figured I might as well give it a try. Boy was that meal a treat.

Soon after this visit I set out to recreate the dish in my kitchen. This recipe has captured my meal that day, spot on. Delicious!

Cilantro Chicken with Steamed Rice
3/4 pound boneless chicken breast
3/4 pound boneless chicken thighs
1/4 c. flour
2 tbsp olive oil
5 fresh jalapenos thinly sliced
3 lg garlic cloves - thinly sliced
1/2 c. finely chopped cilantro
1 tbsp oyster sauce
1 tbsp soy sauce

Cut chicken into 1/2 inch pieces. Sprinkle flour over. Mix to coat

Heat oil in a wok. Stir fry jalapeno and garlic for 1-2 minutes.

Add chicken and stir fry for about 5 minutes until chicken is tender and brown. Add cilantro, oyster sauce and soy sauce. Stir fry about two more minutes. Enjoy with steamed rice.

Thursday, November 5, 2009

Weekend Breakfast Burger


This past weekend one of our goals was to experiment with burger combinations. It's really interesting to think of all the different combinations that can go into a burger. By changing the type of meat, spice, raw ingredients, and sauce, the results are endless. Three of us were doing the taste testing. We all have a bit of 'foodie' in us so it was interesting to see how much each of us differed in our personal preferences.

This Breakfast Burger rated high on my list. I wanted to try a burger with a fried egg but I wasn't sure how that would taste with the burger. Surprisingly, the fried egg was what moved this burger up in my rankings.

You may need a friend to share this with!

Weekend Breakfast Burger
(makes 4 burgers)
Burger
1 1/4 pound pork sausage
1 Anaheim pepper - finely chopped
2 tsp dried oregano
1/2 clove garlic - minced
1 tsp salt
1 tsp pepper
Sauce
3 tbsp mayonnaise
1/2 clove garlic - minced
Salt and pepper
Topping
1 tbsp of butter
4 eggs
4 slices of smoked Gouda cheese
8 slices of prosciutto
4 Kaiser rolls
1 tbsp of butter for the rolls

Mix pork sausage with other burger ingredients being careful not to over mix. Divide into 4 equal size portions and press into patties. The patties should be about 1/2 thick with a slight indent in the middle. The indent will prevent the patty from puffing up during cooking.

Mix sauce ingredients and set aside.

Butter the buns.

Preheat your grill for about 5 minutes on medium high heat. Place your burgers on the grill and cook the first side for about 7 minutes. After you flip the burgers, place the cheese on top of the burgers to melt. Cook burgers on the second side for about 4 minutes.

Heat the skillet for your eggs and melt 1 tbsp of butter. Once you turn the burgers, gently break the eggs into the skillet. Once the egg whites are opaque flip the egg and finish cooking for 30 seconds. Grill prosciutto for 30 seconds right before you pull the burgers off the grill.

Place buns on grill to toast for a minute or two. Watch carefully so that the buns do not burn. Pull off the heat when toasted.

Spread the sauce on the each side of the buns.

On the bottom bun stack the burger, prosciutto, egg and then the top bun.

Enjoy.

Wednesday, November 4, 2009

Cannelini Beans with Beet Green Ribbons


Looking for that light, healthy side dish that packs in the flavor? This side dish will make you want to eat healthy.

When I was in the market this week to pick up beets I was approached by a lady that wanted to know if you could eat the greens from beets. We ended up having a conversation about this power food. Beet greens are wonderful simply sauteed with a little salt and pepper or as an added ingredient to other dishes.

The creaminesss of the cannelini bean pairs well with the wilted beet green. The sun dried tomato adds a little sweetness with a slight acidity to help balance and pull the flavors together.

Cannelini Beans with Beet Green Ribbons
3 cups of beet greens
1 tbsp of olive oil
1 can cannelini beans
1/3 c. sundried tomatoes - finely diced
1/2 lemon - juice
1 tbsp red wine vinegar
1 minced clove garlic
1 tbsp finely chopped flat leaf italian parsley
salt and pepper to taste

Saute greens in 1 tbsp of olive oil until greens are wilted. Strain and rinse can of beans. In a bowl add remaining ingredients. Mix well. Add salt and coarse black pepper to taste. This recipe can be served warm or chilled.

Tuesday, November 3, 2009

Panko-Gruyere Crusted Tilapia


During the week my dinner of choice is seafood of some type. Seafood, whether it's fish or shellfish is light, flavorful, and can be cooked in a variety of ways.

In Southeastern Ohio variety is limited. Oftentimes, I find myself using tilapia again and again. Typically I'm sauteing tilapia using a variety of seasonings depending on my mood.

Today, I decided to try a technique that I've been real successful with when cooking chicken. The recipe uses one of my favorite ingredients, panko. Panko, the Japanese breadcrumb, is light and crispy. It really enables you to get a nice crunch and can be used in a variety of cooking techniques to add great texture.

Where I live we are fortunate to have an amazing Asian/International market so sourcing panko has never been an issue. When I first started using panko about 10 years ago, I know that friends haven't always been able to find it easily. Now, it is a commonly stocked item in supermarkets making it much more accessible to the home cook.

Panko-Gruyere Crusted Tilapia

4 Tilapia fillets
1 1/2 cups of panko (Japanese breadcrumbs)
3/4 c. finely shredded Gruyere
1 tsp dried French Thyme
1 tsp Salt
1 tsp freshly ground black pepper
1 tbsp Dijon mustard
3 tbsp canola oil


Grate cheese with a micro plane to get a fine texture.

Place panko, cheese, thyme, salt and pepper on a plate. Mix well to incorporate all ingredients.

Lightly brush mustard on both sides of each tilapia fillet and press breadcrumb mixture to each side of the fillets.


Heat oil in a skillet on medium high. When oil is hot. Cook on the first side until crispy, about 3-4 minutes. Flip and cook for another 2 minutes.

Serve alongside your favorite side dishes.

Monday, November 2, 2009

Spring Greens and Beets with Grapefruit and Wine Soaked Cranberries


This spring and summer I started to understand the beautiful and delicious characteristics of the beet and the grapefruit. My awareness came on separate occasions.

The beet experience came first. As a kid I remember eating pickled beets and eggs but I couldn't recall any other memories of the beet. As an 'experiment', I grew beets in my garden this spring. When they were ready to harvest in early summer I made a pickled beets and egg recipe. During the process of making the beet pickles, I tasted the cooked, non pickled beet. It had this wonderful aroma and a hearty but sweet, earthy flavor. (See the following link on Beetroots to learn about the many nutritional benefits of the beet.)

My grapefruit experience came on a separate occasion. I grew up thinking that grapefruit is a breakfast food that you cut in half and used a knife to cut away the membranes, sprinkle with sugar and eat. Then, I was visiting a client this summer and he sat in front of me, peeling a grapefruit, munching while we talked. It was a revelation. What I've learned is that beyond the major nutritional benefits of the grapefruit, they are really tasty by themselves or in dishes.

Grapefruits are said to be a great source of vitamin C and lycopene along with potentially reducing cholesterol. (See Grapefruit-Wikipedia)


Spring Greens and Beets with Grapefruit and Wine Soaked Cranberries
Salad

1/3 c. cranberries
1/3 c. white wine
1 lg yellow beet
2 lg red beets
1 ruby red grapefruit
4 cups of spring greens
Dressing
¼ c. olive oil
Grapefruit juice from fruit remaining after segmenting
Juice from ½ lemon
1 tbsp red wine vinegar
1 tsp Dijon mustard
1/2 – 1 clove of garlic (depending on size of the clove)
Beets can be cooked a day ahead of time or right before making the salad. Trim beets. Cook beets whole. To avoid leaching of beet color trim beets stems 1 inch from beets and leave main root uncut. Wash, stripping as many tiny thread roots off as possible. Fill pot of water to cover beets and bring to boil. Once you bring to boil, lower heat to a simmer. Simmer until beets are tender but have a touch of resistance to the prick of a fork. The time will vary greatly depending on the size of the beet. The time range is likely to be 30-45 minutes. Cool. Cut the root and stem end off. Peel the skins off and slice the beets in ¼ inch slices.
Soak the cranberries for an hour.
Segment the grapefruit. Cut off each end and then trim off the rind. Once you have the meat of the fruit without the rind, cut each segment out. You’ll be left with the pith of the grapefruit. In a separate bowl, squeeze the juice out for the dressing.
Combine dressing ingredients and whisk to bring together. Whisk together immediately prior to pouring over salad.

Place greens in a bowl with beets and grapefruit. Drizzle dressing over. Mix and serve.

Sunday, November 1, 2009

Steamed Top Neck Clams with White Wine, Thyme and Herbed Cheese


Perfecting steamed clams has been elusive to me until recently. At the market, fishmongers have guided me that the best eating clams are little necks. The common instruction has been that Little Necks Clams are steaming clams and Top Neck Clams are more for soups and stews.

Little necks clams are small and delicate. They are good but I was always a little disappointed because I expected more flavor. A few months ago, I followed my gut, picked up some Top Neck Clams and discovered that this clam had the more intense taste and texture I was looking for. I enjoy the flavor of a clam that is meaty and slightly chewy. I’m sure Little Necks have a place in a dish but to me Top Neck Clams are a better eating clam. Top Neck Clams are about double the size of Little Neck Clams and have a much more pronounced ‘clam’ flavor. Try 'em, they're good!

Steamed Top Neck Clams in a Thyme Wine Sauce

1 dozen top neck clams
1 cup dry white wine
1 ½ tbsp an herb cheese
2 sprigs of thyme – pull leaves off
2 tbsp fresh flat leaf Italian parsley - finely chopped
1/ 2 lemon cut in quarters
1 ½ tbsp butter

In a medium stockpot with lid on medium high heat, add wine and bring to a simmer for three minutes. Stir in herb cheese and thyme. Add clams and cover with lid to steam until clams open, about 5 minutes. With a slotted spoon place clams in a serving dish. Add parsley to the steaming liquid and pour over clams. Serve with lemon and melted butter on the side.