Monday, June 28, 2010

Pickled Beets - Summertime Pleasure!


Pickled Beets are amazing. Last year I became obsessed with beets. It's sad that I let so much time go without beets in my life. I say that because my mom used to make beets but until last year I haven't had them since childhood. That is time wasted.

But, no worries. I am making up for lost time.

Pickled beets have the most amazing texture - smooth and firm. It's hard to believe they're not candy. We've already canned a big batch of beets this year and I made sure to include a lot of onions. The Hub and I were always fighting over the onions in the batch from last year so I had to make sure we had a bunch. Plopping a few hard boiled eggs into each jar won't hurt either - until you've eaten the 2 eggs and there's none left. ;)

If you forgot to grow beets this year, don't fret. Run over to your local farmer's market (or grocery store if you're really desperate) and buy some.

15-20 medium sized beets
1 pound of onions
3 1/2 cups of white vinegar
2 cups sugar
1 1/2 cups of beet water (cooking liquid)
1 tbsp kosher salt
a dozen hard boiled eggs

Prep your beets. Cut the stems off about 1 inch from the top. Trim the root off. The reason why you want to cut the stem an inch from the top is to ensure the glorious beet color doesn't leach out during cooking. Place the beets in a large pot and cover with water. Bring to a simmer and simmer for about an hour.

Once tender when pricked with a fork remove from heat by using a slotted spoon to pull the beets out of the hot water. Save 1 1/2 cups of the beet cooking liquid Let cool until they are cool enough that you can handle them. Now cut off the top and peel the skin. Slice the beets into about 1/4 inch thick slices.

Slice the onions.

Prepare your lids and jars (about 6). Do this by running them through a scalding hot water bath.

Bring a large canning pot filled with water to a boil.

In a separate pot bring the beet cooking liquid, vinegar, sugar, and salt to a boil.

Carefully pack the jars by layering the onions and beets. Be careful not to touch the edge of the jar. Fill to about 3/4 inch from the top. This can be accomplished most easily with a canning funnel.

Pour the liquid over the tops, covering the beets completely until the liquid comes to about 1/2 inch from the top. Cover with the sealing lid and screw on the top. Carefully lift the jars with canning tongs into the boiling water and boil for about 5 minutes. Remove and let sit on a towel covered area on your counter. Allow to sit until the seal is made. You can tell the jar has a seal when the center of the lid is impressed and not 'clickable'.

Serve as a wonderful snack, breakfast treat or as part of your antipasta tray during your next football party.

Wednesday, June 23, 2010

Beet Green Lasagna with a Bechemal Sauce


We recently made a batch of pickled beets. I was really surprised at our harvest this year as last year was a little disappointing. Well, when you harvest beets, we're also harvesting beet greens. Nobody in our house is too disappointed with that since it's one of The Hub's favs.

To give you an idea of exactly how many beet greens we had to use up, the greens filled 4 (FOUR!!!) plastic grocery bags that were packed. I'm pretty proud of myself because none went to waste. This recipe was one of my more creative uses since mostly we just wilted the greens as I did in this recipe and ate them plain.

For a little more decadence and elegance I highly recommend trying this instead of wilted greens alone.


Beet Green Lasagna with a Bechemal Sauce

10 ounces of lasagna noodles
2 pounds of beet greens
1 tbsp olive oil
3 anchovies
1/2 tsp crushed red peppers
8 ounces Gruyere cheese
4 ounces provolone cheese
3 tbsp butter
3 tbsp flour
1 1/2 cup of chicken stock
1/2 cup heavy cream
salt and pepper

Preheat oven to 375 degrees.

Cook lasagna noodles in a pot of salty water for 4 minutes. Remove and let cool.

Cut the greens in batches to create ribbons of beet greens. Heat a skillet on medium heat. Add the crushed red peppers and the anchovies mixing with a wooden spoon until the anchovies have dissolved into the oil. Add the greens in batches depending on how much the pan can hold until all the greens are wilted. Remove from the heat.

Make the bechamel sauce. Melt the butter in a saute pan and slowly stir in the flour. Allow the butter and flour mixture to gently cook for about a minute. Slowly stir in the cream and stock until the sauce is slightly thickened. Add salt and pepper to taste.

Create an assembly line with the ingredients - cheese, lasagna noodles, beet greens and bechamel sauce.

In a baking dish begin assembling the lasagna. To avoid sticking on the bottom start with a spoon full of bechamel sauce spread over the baking sheet. Next layer the noodles to cover the bottom of the pan. With your fingers, spread 1/3 of the beet greens evenly over the lasagna noodles. Sprinkle 1/4 of the cheese over the beet greens and then spoon more bechamel sauce over the cheese. Continue layering the lasagna, beet greens, cheese and bechamel for 2 more layers. The lasagna should be topped with a layer of noodles, bechamel and cheese.

Cook at 375 degrees until bubbly and golden, about 25 minutes. Allow to cool for about 5 minutes to allow to set.

Tuesday, June 22, 2010

Flatbread with Anchovies and Basil


Looking for that quick and easy dinner idea that is full of flavor but EASY?

Well, I came up with this little treat one evening when I wasn’t in the mood to cook. We had recently gotten home from vacation, the garden needed weeding, the carpet (which was really dog hair) needed removed and in general life was really overwhelming trying to keep up. I did eventually get caught up on getting my life back under control. (Theoretically. ;) Even though this recipe was an afterthought, I’d definitely make it again.

The recipe here calls for Greek style pitas which are thicker and softer than the pocket style pitas. They are great for pita wraps and pizzas. Very tasty indeed!

Flatbread with Anchovies and Basil
4 Greek style pitas
1 large handful of fresh basil leaves - chopped
1 can of anchovies
2 cups provolone cheese
1 tbsp olive oil

Preheat oven to 400 degrees. Line a baking sheet with tin foil to make cleaning super easy. Brush each side of each pita with the olive oil. Bake for 4-5 minutes until the bottom is slightly crispy.

Flip the pitas and top the crispy side with the chopped basil leaves. Top with the cheese and divide the anchovies among the four pitas. Bake for another 5-7 minutes until the cheese is warm and bubbly.

Place each pita on a cutting board and cut into eights. Serve with a light salad topped with a simple vinaigrette for a more rounded meal.

Monday, June 21, 2010

Refreshing Icy Basil Tonic


Next time you're encountered with a sweltering hot summer day and you need a little pick me up try this icy cold beverage. Sipping on this drink will make you forget about the heat and will put some extra bounce in your step.

3 cups ice
2 shots of gin
4 large leaves of basil
1/2 cup of pineapple juice
1 1/2 cup of diet tonic


Throw it all in a blender. Blend until the ice cubes are completely ground. Pour into a tall glass and top with a little basil top.

Close your eyes. Sip, slowly....

Saturday, June 19, 2010

Fennel and Beet Salad with Queso Fresco and Snapped Peas


I am having the most delectable harvest of beets this year. It is hard to describe how pleased I am. It seems like I won the lottery because I have lots of beets AND beet greens. Both are soooo amazingly yummy. In an effort to please the husband I roasted beets for a salad. The Hub is used to me coveting the beets for my batches of pickled beets (which are also amazing – especially canned up and saved for a fall football game snack!) so he rarely gets beets simply roasted without being pickled

This recipe was inspired by a recipe in the A16 cookbook. I embellished quite a bit with other ingredients I had on hand. Not only was this a beautiful dish but it tasted great the evening I made it for my folks and it was excellent as leftovers. (I’m not a fan of leftovers so that’s saying a lot.)
Fennel and Beet Salad with Queso Fresco and Snapped Peas
2 bunches of beets
1 fennel bulb
1 cup freshly shucked peas
½ cup crumbled queso fresco
3 tbsp olive oil
2 tbsp of red wine vinegar
Salt and Pepper
Heat oven to 375 degrees. Cover a small sheet pan with tin foil. Cut the stem of the beets about an inch from the top of the beet. Trim off the roots. Wash thoroughly to remove any soil. Place the beets on the sheet pan and drizzle 1 tablespoon of the olive oil over the beets. Rub the beets with your hands to make sure the beets are covered with the olive oil. Pull the tin foil around the beets to lock in moisture. Roast for about an hour or until tender. Remove from the oven and allow to cool enough so that you can handle them.

Cut the tops off and remove the skin. Slice the beets into approximately ¼” slices.

Drizzle with 1 tablespoon of olive oil, 1 ½ tbsp of red wine vinegar, salt, and pepper. Toss.

Cut the fennel fronds off the fennel bulb along with the root. Discard the fronds. Thinly slice the fennel bulb and place in a bowl. Drizzle with ½ tablespoon of olive oil, ½ tablespoon of red wine vinegar, salt and pepper and toss.

In a small sauté pan toss the peas in a ½ tablespoon of olive oil, salt and pepper and sauté for about 2 minutes.
Plate the dish by laying the beets down on plate flat while slightly overlapping the slices. Next, layer the fennel slices over the beets. Top with the sautéed peas and queso fresco.
This is a perfect salad to serve when you are entertaining. Great combination of flavors and textures. Delightful!

Friday, June 18, 2010

Lemon Verbena Cake with a Blueberry Jam Glaze


I’m not typically a sweets person but every now and then I find the calling to get in the kitchen and bake. I love lemony desserts. When I saw the recipe for 'Olive Oil Cakes with Lemon and Thyme’ on the Pioneer Woman’s blog I couldn’t resist.

I’ve tried this recipe in a multitude of forms – mini muffins, regular muffins and cakes. My favorite for sure is the cake form. I’ve not had the greatest luck with making a cake from this recipe that looks perfect. The middle tends to fall. I’ve adapted the recipe with the addition of baking soda which seems to help somewhat. Either way, looks aside, every time I’ve made the recipe, in whichever form, it’s been very tasty and extremely moist! The moistness and intense flavor are the reasons I continue to experiment with this recipe. This recipe is also incredibly easy to make!

This time I made a cake and changed the recipe up with lemon verbena instead of thyme.

The lemon verbena herb variation is my favorite experiment because the herb intensifies the lemonyness. Is 'lemonyness' a word?

For a glaze, I spread a blueberry jam on top. The glaze completely compliments the intense lemon flavor.


Lemon Verbena Cake with a Blueberry Jam Glaze
1 tab of room temperature butter
1-⅓ cup Sugar
3 Tablespoons Grated Lemon Zest
2 whole Eggs
¼ cups Olive Oil
⅔ cups Whole Milk
1 cup Flour
½ teaspoon of baking powder
½ teaspoon of baking soda
½ teaspoons Salt
1 tablespoons of finely chopped lemon verbena

Glaze
½ cup of blueberry jam

Preheat oven to 350 degrees.

In a bowl whisk together the sugar and lemon zest. Whisk in the eggs, olive oil and milk. In a separate bowl whisk together the dry ingredients: flour, baking powder, baking soda and salt. Whisking the dry ingredients will serve as a sifting agent to eliminate clumps within the flour.

Slowly add the dry ingredients to the wet ingredients. Avoid over mixing. Once the dry and wet ingredients have been combined, fold in the lemon verbena into the batter with a spatula.

Pour the cake mixture into a 9” cake pan. Bake for approximately 25 - 30 minutes depending on your oven.

Allow to cool.

In a microwave, warm the jam for about 30 seconds. Drizzle over the cake and serve. Your guests will love this cake!

Thursday, June 17, 2010

A16 - A truly memorable experience!


It’s been a week since we returned from an exhausting vacation out to the west coast, San Francisco, specifically. I became increasingly interested in the San Francisco food scene once I purchased and read the book A16. The chefs at A16 have gone through a thoughtful, investigative journey through the Campania region of Italy to understand the ingredients and culture of the region. The other key reason why A16 kindled my interest in the San Francisco food scene is the way A16 chefs live by the concepts of the local food movement by cultivating relationships with local farmers to provide the meat and produce for the restaurant.

Honestly, as much as I love the A16 cookbook, I was nervous to go there. I was nervous that I would be disappointed and it wouldn’t live up to the high expectations that I had. The opposite happened. The experience was definitely one of the best dining experiences I’ve had.

My husband and I visited during lunchtime right when the restaurant was opening. We were guided back through the long narrow restaurant, past the bar area to the dining and kitchen area. The kitchen area is completely open to the dining area so we could see all the preparation taking place for future meals. Finished very minimally with little decoration, the restaurant’s ambiance is dependent on the connection between the wait staff and the preparations taking place in the kitchen.

When we arrived Liza Shaw and another chef were deboning ducks to prepare for a stuffed duck dish that was to be served at a Napa charity auction the next day. Liza is one personable lady. She answered all my questions and seemed to be having a great time herself. Refreshing to see someone having so much fun while they work.

Known for their pizza and meatballs, we figured these would be good items to order. Both were amazing. The chefs only use San Marzano tomatoes to make a simple yet full flavor sauce. I only cook with San Marzano but my husband and I think I must cook them too much because I’ve never been able to coax as much flavor out as they did. We ordered the Romano pizza which has no cheese on it. It was delicious. The absence of the cheese allowed the flavors of the sauce, olives and anchovies to come through. The meatballs were tender beyond belief and bursting with flavor. Through lunch we asked the server to choose the wine for us. The wine was excellently paired.

I’m typically not a dessert fan but the dessert at A16 was a knock out. We ordered both the ‘chocolate budina tart with sea salt and olive oil’ and the ‘Strawberry Gelatina and Basil Granita with Mascarpone Mousse’. The strawberry gelatina dessert was by far the most creative use of taste, texture, and temperature that I have had to pleasure to experience. Served in a canning jar, the bottom was filled with a strawberry based gelatin and then topped with the mousse which was then topped with the icy, crunchy, bright green basil granita. A spoonful that had a little of each layer was heaven.

I’ve had that Strawberry gelatina dessert in my head since our visit. I sent a comment through A16’s website letting them know how much I enjoyed the experience and asked for the recipe. Low and behold, Lori, the pastry chef emailed me last night with their batch recipe! What super nice people!

If you live or visit San Francisco, I would highly recommend that you seek out a meal at A16 on 2355 Chestnut Street.

Wednesday, June 2, 2010

Bodacious Beets and Beet Green Pizza

Beets are so underrated. There are tons of recipes using beets in salads but so often when I talk about my love of beets people will look at me like I’m crazy. Maybe they’re just under rated where I live. Maybe in the Metro cities more people are accepting of this root vegetable. Or maybe I feel this way because I truly started to really appreciate them last year so I think everyone else should too. Either way, find a way to bring beets into your life and onto your plate.

As beets are growing it is so wonderful to run outside, clip off some leaves and make a simple side of wilted beet greens. Wilted beet greens sautéed with a little bit of crushed red pepper and garlic make a WONDERFUL pizza topping!


Most of the recipes that you’ll find out there using beets in salads will have you roast the beets, de-skin and slice to go with fresh arugula or grapefruit slivers or fresh feta cheese. Lots of combinations can be discovered because quite frankly they are all pretty tasty. I love to make pickled beets too.

Last year I didn’t have a ton of luck growing my own beets because I planted the seeds too close and I didn’t thin the seedlings enough. It is really important to allow each plant enough room to grow a 2-3 inch round root. Obviously, when you thin beets it is a perfect opportunity to use the tops in a baby green salad or if the leaves are large enough an impromptu wilted green burrito. This year I started with a few rows that I planted on March 1st. Then I planted a few more rows in April and then again in May so I could ensure a continuous crop.

Beet Green Pizza

1 recipe of pizza dough (click to go to previously posted recipe for the dough)
3/4 - 1 pound of provolone cheese depending on cheeseness preference (I prefer Boar's Head brand cheese)
1 1/2 pound of beet green leaves
1 cup of your favorite tomato sauce
1 tsp of olive oil
3 cloves of garlic - thinly sliced
1/2 tsp crushed red peppers

Heat oven to 400 degrees.

Heat a saute pan with the olive oil and crushed red peppers. Stack the beet green leaves on top of each other and cut into roughly cut slices. Add the greens to the skillet and saute just until the greens are wilted. Remove from heat.

Sprinkle a pizza stone lightly with cornmeal. Roll out the dough to the size of your stone and place on top. Spread the pizza sauce, evenly distribute the greens and top with cheese. Cook in a 400 degree oven for about 20 minutes. (Check frequently because ovens can vary quite a bit.


Enjoy a healthy, delicious pizza!

Tuesday, June 1, 2010

I’m Back! Ready to share the summer with you!

Well, I apologize that I’ve been slacking on the posting lately, but when I get home from work I feel like my life is a whirlwind of things that need to get done or be tended to.

First, remember that gorgeous new puppy that joined our family in March. Well, let’s just say, he is a bit high maintenance. And, we discovered I’m not the most nurturing type, at least from the perspective of having to constantly watch and clean up after the little tiny thing. When he’s finally resting in his cage I end up taking the time for a much needed rest. He’s growing up fast and we’re all into more of a routine so I’m not feeling quite so frazzled. Can you imagine if I had kids? Scary to think... Bear looks all cute and sweet here but don't let him fool you!


Perennial and vegetable gardens have also been consuming my time. I really ramped it up this year to improve our harvest. I added a new garden that is about 20’ by 50’. We amended the soil well with mushroom compost and sand tilled into the ground.
In this new garden we planted jalapenos, japanese eggplant, butternut squash, yellow squash, zucchini, beets, green beans, dill, carrots, radishes, and snow peas. All the plants are growing great so I think the amended soil will prove to be well worth it.

Our fenced in garden has horrible soil and gets the harshest sun exposure. For this garden we brought in a mixture of mushroom compost, sand and mulch. I’m hoping the mulch addition will help this garden retain moisture therefore being gentler on my little plants. We have planted sun loving varieties of vegetables that really withstand the sun, such as, sweet corn, cayenne, habanero, poblano, and hot hungarian wax pepper along with tomatoes and cucumbers.

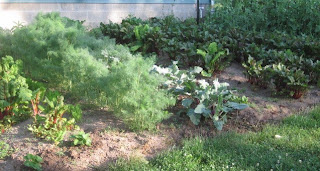
In another smaller garden that's up against the house I've planted a variety of herbs such as lemon thyme, thyme, lemon balm, sage, tarragon, and lemon verbena. This garden was planted on March 1st with many vegetables that can be started in the cooler season.


In this garden I've also planted beatuiful 'bright lights swiss chard', romain lettuce, fennel, beets, rhubarb, kohlarabi and glorious peas. I've never grown kohlarabi and fennel before so I'm pretty curious to see how these plants turn out.

The kohlarabi plants are gorgeous. I've heard they are great in salads or roasted.


Swiss Chard is one of my all time favorites along with peas. The swiss chard I planted is the 'Bright Lights' variety and is known for the brightly colored stems and veins that run through the plant.


Swiss chard and peas are so versatile, and beautiful while they are growing.


One can cook peas and chard in a variety of ways or simply saute them with a little butter, salt, and pepper for a little vegetable side. Both are prolific growers and the more you pick the more they will continue to grow.

I’ll continue to share my garden with you in future posts along with passing on ideas of ways to take advantage of a hopefully bountiful harvest.